malepatternboldness2

  • Subscribe to our RSS feed.
  • Twitter
  • StumbleUpon
  • Reddit
  • Facebook
  • Digg

Thursday, February 10, 2011

Men's Shirt Sew-Along 10 -- Finishing Up!

Posted on 4:14 AM by dvdsvdsdv


It doesn't seem possible but it's true: today the first part of the MPB Men's Shirt Sew-Along draws to a close.

Now I have a suspicion, judging from your comments (and lack thereof) that not everybody is at this point in their projects yet.  Let me reiterate: no one is required to have a muslin done by today; you are always allowed to work at your own pace.

That said, I do require all Sew-Along participants to have a completed shirt-like garment (no ponchos please) by the end of February, past which point you must personally request a 15-day extension.  Those who still have not completed a garment by March 15 will receive an Incomplete and may be required to attend summer school.  And please don't try removing the label from a store-bought shirt and using that -- you're only cheating yourself.

I try to be lenient but invariably some take advantage.  Like a nosebleed, a little gentle pressure helps.

And now onward.

Our goals today are:

1. Clip facings (Did we do that already?), turn and press

2. Attach buttons and make buttonholes

3. Hem

4. Pat yourself on the back or wherever you like patting

1. I think I covered clipping the corners of our front facings to create nice sharp top corners on our shirt fronts.  Now let's be sure to clip (or grade) the rest of our front facings too.  Once we stitch on our buttons and make our buttonholes, we'll no longer have access to them.


Basically we want to remove bulk wherever we find it.  When you're done, press the facings once again: we want to make sure that when we sew on buttons and make buttonholes, the facings lay perfectly flat against our shirt fronts.

2.  Now we're ready to talk buttons and buttonholes.

NOTE: I found the top button as marked on the Negroni pattern to be too high for my neck.  Button placement is very much a question of personal preference.  Before you attach your buttons, have the wearer try the garment on.  Where would he/she like the first (top) button to go?  Remember that the Negroni has a camp collar which spreads at the top.

 I generally don't mark my buttonholes until my shirt is nearly done and my Negroni muslin was no different.  I forgot, however, when I marked them that the pattern includes a 5/8" seam allowance.  I attached my buttons and then wondered why they were so far in from the edge (and why the shirt felt snug up front) until I remembered this.  Luckily buttons are easily removed and reattached, not so buttonholes.  Please don't make this mistake!


The button line should be 5/8" in from the edge of the shirt front, or 1 1/4" from the edge of the pattern piece.  Is that clear?  (The orange line above shows the seam allowance on the shirt front pattern piece.)


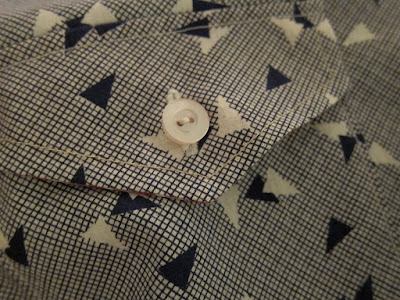
Having marked my buttons with the supposedly-disappearing ink pen, I proceed to stitch the buttons on.  I use a zigzagger sewing machine to do this.  I tape the button down first and then, using my button foot and with the feed dogs down, stitch them in place.


I am then ready to make my front buttonholes which, like my pocket flap buttonholes, I make with my vintage Singer buttonholer.  Again, make sure your facings are flat against your shirt front.  If you're making a men's shirt, the buttonholes should be on the left front side.


I always reinforce my buttonhole with a bit of Fray Check.


Now add your buttonholes to your cuffs.  Buttonholes go on the top (or over) placket side; the button is attached to the under placket side.  I've gotten these mixed up in the past with disappointing results.

I also add my buttons to my shirt pockets.


3. Now it's time to hem the shirt.  The method I generally use here is to fold the hem up approximately 1/8" (or as narrow as I can get it), stitch, and then fold up again and stitch once more.


I decided to get a little fancy this time and, after finishing my first line of stitching from front to front,  finished the front facings by stitching them right sides together and then turning them right side out.  This resulted in less bulk along the width of the facing.

I stitched the facings (right sides together) at approximately 1/4".


I clipped the bulk in the corner.


And I turned right side out.


I then stitched the rest of the shirt hem a second time.


And there you have it, friends -- my muslin is done and I need a shave.


The fit on me is good though not perfect.  Somebody with wider shoulders has already laid claim to it, however.


I'll address fit later.  For right now, I am happy to be finished!

I see in our Flickr group that quite a few people have posted photos of their muslins and most look awful nice.  Now it's time to evaluate our results.  Get those husbands dressed and photographed, whatever it takes.

Congratulations to those who've stayed with me thus far.  To the many who are catching up (or just getting started), hang in there.

Have a great day, everybody!
Email ThisBlogThis!Share to XShare to FacebookShare to Pinterest
Posted in Men's Shirt Sew-Along | No comments
Newer Post Older Post Home

0 comments:

Post a Comment

Subscribe to: Post Comments (Atom)

Popular Posts

  • Men's Shirt Sew-Along 17 -- Penultimate Post and Negroni 3 REVEAL!
    Loyal Sew-Alongers, Sew-Alongettes, and others, it's nearly time to say good-bye to our first-ever MPB Men's Shirt Sew-Along. The pa...
  • Requisite Halloween Post
    I don't think it's too early, do you? I recognize Halloween is a subject of relevance only to Americans (or so I believe); my apol...
  • The Last Toggle Post
    Dear readers, a million thanks for yesterday's comments.  I think we're all going to enjoy wearing this coat and don't think I...
  • MPB Men's Boxers Sew-Along 3 -- Let's Start Sewing!
    Good morning, Sew-Alongers and others eager to learn how to make boxers.  Today we are going to start sewing!  Yesterday I neglected to ment...
  • Behold the Refinished Featherweight Table!
    Friends, I simply couldn't wait till 2012 to show you my refinished Singer Featherweight table, which I fished out of the trash only one...
  • Shirt collar-palooza and the 1939 men's shirt
    Good morning, shirt mavens and others!  Here at Male Pattern Boldness , we're busy.  So busy in fact that my staff is demanding time-and...
  • The Wacky World of Color Forecasting
    Before I get started, why does current fashion illustration make women look like Bratz dolls?  I don't like it one bit. Moving right alo...
  • Can you see my butt crack?
    Readers, today I'm going to challenge your sense of decorum and tolerance.  The easily offended might want to come back tomorrow. Oh wis...
  • Doing Alterations for Others - Yea or Nay?
    Like many home sewers, I'm not into altering other people's clothes.  Heck, I don't even like to alter my own!  (Though, ironica...
  • Happiness is a Clean Sewing Table
    This may not look like anything to brag about to you, neat readers, but for me this is as good as it gets.  I can actually see the table und...

Categories

  • 20s glamour
  • 30s glamour
  • 40s glamour
  • 50s glamour
  • 60s glamour
  • 70s
  • age and aging
  • beauty
  • body art
  • books
  • button loops
  • Cathy
  • clothing and culture
  • completed projects
  • contests
  • crinoline
  • Daily Ditch (The)
  • decluttering
  • dime store psychology
  • dogs
  • dolls
  • Doris Day
  • fabric
  • fashion show
  • faux fur
  • flea market
  • Ginger Rogers
  • Guy week
  • Hats
  • interfacing
  • ironing
  • Jeans Sew-Along
  • Kenmore 158.1040
  • makeovers
  • Men's Boxers Sew-Along
  • men's fit issues
  • Men's Shirt Sew-Along
  • mens bathing suit
  • mens fashion
  • mens grooming
  • mens jeans
  • mens pajamas
  • mens pants
  • mens patterns
  • mens shirt
  • mens suit
  • mens toggle coat
  • mens underwear
  • mens western jacket
  • modeling
  • mothers
  • movies
  • MPB Day
  • my life
  • pattern drafting
  • patterns
  • Peter on video
  • Pfaff 30
  • project planning
  • sergers
  • sewing and culture
  • sewing basics
  • sewing machines
  • Shoes
  • shopping
  • singer 15-90
  • Singer 15-91
  • Singer 201
  • Singer 66
  • Singer 99K
  • Singer Featherweight
  • Singer treadle
  • topstitching
  • video
  • women I love
  • works in progress
  • YEA or NAY?

Blog Archive

  • ►  2012 (35)
    • ►  February (16)
    • ►  January (19)
  • ▼  2011 (313)
    • ►  December (24)
    • ►  November (25)
    • ►  October (20)
    • ►  September (29)
    • ►  August (21)
    • ►  July (24)
    • ►  June (22)
    • ►  May (30)
    • ►  April (28)
    • ►  March (31)
    • ▼  February (28)
      • More Shirts, More Dolls -- Wow!
      • Doll talk + Cathy's Comeback muslin!
      • When Ken Met Allan or "Guys and Dolls"
      • How Much For A Vintage Pattern or "10 bucks -- for...
      • BREAKING -- We interrupt this crinoline...
      • Crinoline confessions for a Wednesday morning
      • Taffeta, tulle, and the big, BIG dress
      • Men's Shirt Sew-Along 18 -- So Long, Sew-Along + T...
      • Men's Shirt Sew-Along 17 -- Penultimate Post and N...
      • Saturday Smorgasbord with a side of Sew-Along
      • Men's Shirt Sew-Along 16 -- New and Final Negroni ...
      • New Acquisitions: Insomnia Edition
      • Men's Shirt Sew-Along 15 -- Addressing FIT: The Sl...
      • Men's Shirt Sew-Along 14 -- Addressing FIT
      • Men's Shirt Sew-Along 13 -- A new collar for Negro...
      • Men's Shirt Sew-Along 12 -- A new collar for Negro...
      • Men's Shirt Sew-Along 11 -- A new collar for Negroni!
      • Shirt-free Friday + parrot video!
      • Men's Shirt Sew-Along 10 -- Finishing Up!
      • Men's Shirt Sew-Along 9 -- Side seams and cuffs!
      • Men's Shirt Sew-Along 8 -- Sleeves, etc.
      • Men's Shirt Sew-Along 7 -- Let's get our collar on!
      • Men's Shirt Sew-Along 6 -- Putting it together, bi...
      • Men's Shirt Sew-Along 5 -- Collars and Cuffs and (...
      • Men's Shirt Sew-Along 4 -- The Placket Racket
      • Men's Shirt Sew-Along 3 -- Pockets, Plackets and P...
      • Men's Shirt Sew-Along 2 -- Cut it out already!
      • Men's Shirt Sew-Along 1 -- Let's get started!
    • ►  January (31)
  • ►  2010 (152)
    • ►  December (30)
    • ►  November (27)
    • ►  October (31)
    • ►  September (30)
    • ►  August (23)
    • ►  July (11)
Powered by Blogger.

About Me

dvdsvdsdv
View my complete profile