


Sew-Alongers, as exciting as yesterday was, it gets better today, way better. We're ready to cut our muslin.
Our goals today are:
1. Lay out our muslin fabric in preparation for cutting, lining up selvage ends where necessary and locating grainline.
2. Cut our pattern pieces.
3. Make choices about interfacing and cut interfacing.
Before we begin I want to talk about muslins. Most people make a muslin, which is a sample garment, to test for fit. (Sometimes a garment requires multiple muslins.) I have chosen to approach my shirt muslin with the same attention to detail (or nearly) as I would my final shirt so we can learn from it together.
Especially for those who have never made a shirt before, this is an opportunity to try out techniques that are new to you. It is also your chance to get to know your pattern inside and out. The muslin doesn't have to be perfect of course, but I recommend taking time with it. Any time invested in the early stages is time saved in the later stages.
Most of the time it takes to create a garment is not time spent sewing at our sewing machines. It's the cutting, matching, pressing, measuring, etc.
I do not recommend making a muslin out of a fabric that requires excessive pattern matching or that has a nap (i.e., that looks different when brushed up or down, like corduroy). Vertical stripes, however, can be helpful with regard to finding grainlines and keeping verticals vertical.
We have very varied levels of experience. Always work at the level -- and the pace -- that feels comfortable to you.
With no further delay...
1. Sarai has provided sample cutting layouts for the Negroni shirt pattern. Every pattern comes with these sample layouts. Take a look at them. I never follow these to the letter, choosing instead to purchase a little extra fabric so I don't have to worry about running out if I don't cut exactly as instructed. But the layout will remind you which pattern pieces (like the back and collar) need to be cut on the fold of the fabric, as well as which pieces are to be cut parallel with the selvage and which perpendicular. (For those of you who traced your pattern pieces yesterday, you should already have a directional arrow on all your traced pattern pieces.)
NOTE: Cutting on the fold does not always mean folding the fabric in two perfect halves; you can just fold in enough fabric to match the width of your pattern piece. It took me a long time to figure that one out.
If I'm cutting a plaid or a loosely woven fabric apt to shift, I will take extra time to cut one layer at a time rather than two or more. Plaids in particular must match.
2. I always keep the following on hand when I'm cutting: a) rotary cutter, b) self-healing mat (the mat you see in my photos), c) an assortment of clear rulers and straight edges, d) fabric shears, 3) fabric pen (the ink is supposed to disappear in a day or two; doesn't always so use judiciously).

I always keep the following at great distance: a) pets, b) children, c) phones and other distractions.
Those who use rotary cutters will need weights to secure pattern and fabric. I use glass paperweights, candlesticks, whatever I have around the house that is heavy and won't mark my fabric or damage my pattern piece. A rotary cutter requires no lifting of the fabric edge (as fabric shears do) so there is remarkably little shifting on most fabrics and no need to pin (or stitch!) pattern to fabric. Your cotton or cotton poly muslin fabric should be easy to work with and if it's not, find different fabric now.
I fold my fabric wrong-side-out generally (so I can mark things like darts on what will end up being the inside of my garment) and often pin the selvage edges together. The selvage is the vertical, length-wise edge from the original weaving, as opposed to the width-wise edge that marks where your yardage was cut from the bolt.
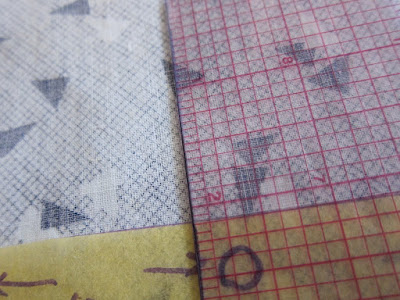
If you look closely at my selvage, it looks different from the rest of the fabric: denser and white on the wrong side.

Each sewer probably has his or her own cutting strategy. Here's the one that works for me.

I get a general sense of what pieces I'm cutting where, working only with whatever fabric fits on my self-healing mat (sometimes a long pattern piece will have to be cut in sections as I redistribute the fabric on my mat). With my Negroni muslin, I decided to cut the back first. I do this on the fold. Since I have my selvage ends perfectly lined up and even pinned, I am confident that I am also even with the vertical grain.
I am fortunate: I can actually make out the fabric's grainline if I look closely at the weave. Sadly this also reflects the coarseness of the fabric.
I secure my pattern to the fabric with my weights, open my rotary cutter and begin. Only when I am ready to cut do I release the red safety button on my rotary blade. I secure it again as soon as I am done cutting. If I am shifting position or moving my fabric, I secure the blade with the safety button. Make this a habit, please. The blade is very sharp.
Having completed cutting my piece, I now transfer the notches and dots. I clip a scant 1/4" slit for each notch. No triangles or anything fancy.

For circles, I put a pin through pattern and fabric, and with a fabric pen mark my fabric (on both "wrong" sides as in the case of my folded back pleat for example, the fabric having been folded with "right" sides together).


My fabric piece cut and marked, I pin it to my dress form. You can put it anywhere you want as long as it's out of the way but the dress form insures that I can identify the piece and don't get right and left sides confused. NOTE: If your fabric has no distinct right and wrong side, NOW is the time to label it. I generally label it in the seam allowance with my fabric pen. Some people use colored adhesive tape.

The "RW" above is a note to myself that this is the right sleeve, wrong side.
I work piece by piece. The more organized you are the easier it will be. Some people check the pattern piece off the instruction list as they cut it. Some people move each pattern piece away as it's cut, or store each piece atop the corresponding piece of cut fabric. Do whatever keeps you organized.
Little by little the fabric gets cut.


I take extra time to make sure I have clearly marked my sleeves. The top (or cap) of the sleeve will have two notches in back, one notch in front. The sleeve placket will be marked near the BACK (two notches) half of the sleeve, where the sleeve will meet the cuff. Take the extra time and you won't get your sleeves confused. It has happened to me many times, friends.
I also clip to mark folds and/or centers. So for the pocket I'll clip at the narrow "first fold" and the wider "second fold" line, a scant 1/8".

If you are not cutting directly on the selvage, you will have to find the grainline of your fabric. It may or may not be visible just by looking at the fabric. I do this in a number of ways, with triangles and rulers.


3. If you are using interfacing, cut that too. Interfacing is generally attached (fused or stitched) to the outside-facing side of two matched sides, i.e., the outside of a cuff, collar, collar stand. If you are interfacing your facings (in Negroni, those long narrow verticals that line up with your left and right front edges and will eventually be turned under) this does not apply.
The rule is generally: crisper side facing out, which makes sense if you think about it.
We've already talked a lot about interfacing. For my muslin I am using self fabric for the facings and cuffs, and fusible woven for my collar, just to experiment. Take advantage of your muslin and experiment!
I decide to do my undercollar, inside cuffs, and under pocket flaps in red gingham. These will not be interfaced.


NOTE: I like to gently dry press my cut pattern pieces before I sew anything. Any fabric cut off the grain is apt to stretch. Keep steam pressing to a minimum and handle gently. (Tomorrow I'll talk about staystitching.)
Friends, that's all we're doing together today. I am here and on Flickr to answer your questions and we are privileged to have a great many experienced sewists with us as well.
If you have your own system for cutting, marking, or organizing that you wish to share that might be helpful to others, please do so.
Happy cutting, everybody!


0 comments:
Post a Comment