malepatternboldness2

  • Subscribe to our RSS feed.
  • Twitter
  • StumbleUpon
  • Reddit
  • Facebook
  • Digg

Thursday, February 3, 2011

Men's Shirt Sew-Along 3 -- Pockets, Plackets and Perfectionism

Posted on 2:54 AM by dvdsvdsdv


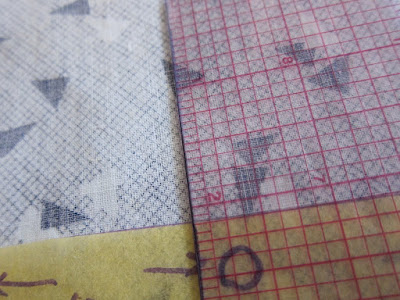
Sew-Alongers, what you are looking at is the first sleeve placket I ever made on my very first men's shirt.  Not pretty, is it?  Here's my first pocket:


I didn't know a topstitch from a topknot.  I had never read a sewing blog.  I show you these not to give you indigestion, but merely as a reminder that things gets better with practice. 

I recommend putting a lot of energy into your muslins and make as many mistakes as you can.   (I've already made a few.)  You don't have to add interfacing, pockets, plackets, or even cuffs to your muslin if you don't feel the need.  But if you're on new ground and learning new techniques, I recommend taking the opportunity to mess up with your crappy fabric.

Be gentle with yourselves.  It's great to push beyond your "comfort zone" but perfectionism can be a real hindrance.  My policy has generally been do your best in the moment and then move on.  The stakes are not high, or shouldn't be.

Today we're going to start sewing a bit.  When you're making a shirt, you can start where you want to start (though I wouldn't recommend hemming first).  I generally like to get the piddly, exacting stuff out of the way early -- though there always seems to be more piddly, exacting stuff remaining.  Some may prefer to interface what needs interfacing before the stitching starts -- we'll do that together soon.

Please note I am not following the order of the Negroni instructions exactly. 

Our goals today are:

1. Create our pocket flaps

2. Create our pockets

3. Stitch on our right and left sleeve plackets   (Moved to tomorrow)

1.  Sarai has chosen to start stitching the Negroni shirt with the pocket flaps -- why not?


BTW, now is a great time to replace your needle if you haven't in a while.  For my fabric (a quilt-weight cotton) and thread (the serger variety) I choose a #11.  I find this to be a great all-purpose size that works for most things I sew.  I use Organ brand needles -- my first brand and I stuck with it.


I have decided to do my top flap in my regular shirting and my bottom flap in contrasting gingham. This makes things easier to see, too. 

NOTE: The seam allowance for the flaps is 1/4" -- remember this when stitching.


You're sewing the top and bottom flap together - RIGHT SIDES TOGETHER - around three sides at 1/4".  You'll want to trim the seam allowance down to approximately 1/8".  You'll then turn your flap right side out and press.

Whenever I'm doing something in two, I do them both at the same time to make sure they're matched.


Some people may want to clip closer to the corners -- see how things look when you turn and press.  Are the edges sharp and thin enough?  You want to avoid visible bulk but don't drive yourself crazy.


If you're using a point turner (that little wooden tool that looks like a blunt letter opener) don't force the point into the fabric but rather form the fabric around the point.  Smaller stitches make it less likely that you'll force the turner through the seam -- he he.

My two flaps completed, I now want to topstitch on those three stitched sides at 1/4".  I'm making this entire shirt with my Singer 66 treadle -- call me crazy.


I choose not to attach these to the shirt yet.  Let's make the pockets themselves.

The Negroni pocket is rounded at the bottom, which personally I find harder to make than a rectangular pocket.  Sarai offers free downloadable pocket variations on her website here.   If you're having a lot of trouble with those curves just try a different pocket shape.

The directions are clear and you should be able to get to this point (see pic) without too much grief.


Now things get trickier.  You're going to want to stitch down those folds at 3/8" and turn them, just like you turned the pocket flaps.  I found it helpful to clip the corners before turning.


Now to shape the pocket, some people like to stitch the fold line and use their stitches as a guide.  I opted to make a cardboard template and shape the edges over that with my iron.  

I used the pattern piece to cut the cardboard and then measured off 3/8" and cut again.


Now I put the template 3/8" from the edge of my fabric, clip my rounded corners and press the edges over my template (with the steam iron).


To hold pocket edges in place before stitching them I sometimes use white school glue, which washes out.  A little dab is all it takes.

Perfect?  No, but good enough for right now.   The  most important thing is that the two pockets match each other.  If two matching pockets are too much, just add one.  Or go with no pockets -- I nearly always do, just for the aesthetics.

There are many ways to make pockets, each with its own challenges and benefits.  Whichever method you prefer, the more pockets you make the easier they'll be.

Friends, that's all we're going to do together today.  If you breezed through pockets and pocket flaps and want to move on, please do.  We'll be tackling sleeve plackets tomorrow.  You can start experimenting with these on your own if you like.  Sarai's instructions for plackets are the best I've ever seen but they can still be a bit of a mind bender.  If you're confused, looking at a RTW men's shirt sleeve can help.

A few people had questions about using rotary cutters and I thought this image might help.  My weight is primarily in my left arm and my right is rolling the blade.  I'm using an Olfa 60 mm. cutter, a size I find neither too big nor too small.  For places I can't get to easily with the blade, I use my shears.


If you have questions or comments, post them here or in the Flickr group, where we also have some excellent resource links shared by our participants.

Happy stitching, everybody!
Read More
Posted in Men's Shirt Sew-Along | No comments

Wednesday, February 2, 2011

Men's Shirt Sew-Along 2 -- Cut it out already!

Posted on 6:40 AM by dvdsvdsdv


Sew-Alongers, as exciting as yesterday was, it gets better today, way better.  We're ready to cut our muslin.

Our goals today are:

1. Lay out our muslin fabric in preparation for cutting, lining up selvage ends where necessary and locating grainline.

2. Cut our pattern pieces.

3.  Make choices about interfacing and cut interfacing.

Before we begin I want to talk about muslins.  Most people make a muslin, which is a sample garment, to test for fit.  (Sometimes a garment requires multiple muslins.)  I have chosen to approach my shirt muslin with the same attention to detail (or nearly) as I would my final shirt so we can learn from it together.

Especially for those who have never made a shirt before, this is an opportunity to try out techniques that are new to you.  It is also your chance to get to know your pattern inside and out.  The muslin doesn't have to be perfect of course, but I recommend taking time with it.  Any time invested in the early stages is time saved in the later stages.

Most of the time it takes to create a garment is not time spent sewing at our sewing machines.  It's the cutting, matching, pressing, measuring, etc. 

I do not recommend making a muslin out of a fabric that requires excessive pattern matching or that has a nap (i.e., that looks different when brushed up or down, like corduroy).  Vertical stripes, however, can be helpful with regard to finding grainlines and keeping verticals vertical.

We have very varied levels of experience.   Always work at the level -- and the pace -- that feels comfortable to you.  

With no further delay...

1. Sarai has provided sample cutting layouts for the Negroni shirt pattern.  Every pattern comes with these sample layouts.  Take a look at them.  I never follow these to the letter, choosing instead to purchase a little extra fabric so I don't have to worry about running out if I don't cut exactly as instructed.  But the layout will remind you which pattern pieces (like the back and collar) need to be cut on the fold of the fabric, as well as which pieces are to be cut parallel with the selvage and which perpendicular.  (For those of you who traced your pattern pieces yesterday, you should already have a directional arrow on all your traced pattern pieces.)

NOTE: Cutting on the fold does not always mean folding the fabric in two perfect halves; you can just fold in enough fabric to match the width of your pattern piece.  It took me a long time to figure that one out.

If I'm cutting a plaid or a loosely woven fabric apt to shift, I will take extra time to cut one layer at a time rather than two or more.  Plaids in particular must match.

2. I always keep the following on hand when I'm cutting:  a) rotary cutter, b) self-healing mat (the mat you see in my photos), c) an assortment of clear rulers and straight edges, d) fabric shears, 3) fabric pen (the ink is supposed to disappear in a day or two; doesn't always so use judiciously).


I always keep the following at great distance: a) pets, b) children, c) phones and other distractions.

Those who use rotary cutters will need weights to secure pattern and fabric.  I use glass paperweights, candlesticks, whatever I have around the house that is heavy and won't mark my fabric or damage my pattern piece.  A rotary cutter requires no lifting of the fabric edge (as fabric shears do) so there is remarkably little shifting on most fabrics and no need to pin (or stitch!) pattern to fabric.  Your cotton or cotton poly muslin fabric should be easy to work with and if it's not, find different fabric now.

I fold my fabric wrong-side-out generally (so I can mark things like darts on what will end up being the inside of my garment) and often pin the selvage edges together.  The selvage is the vertical, length-wise edge from the original weaving, as opposed to the width-wise edge that marks where your yardage was cut from the bolt.

If you look closely at my selvage, it looks different from the rest of the fabric: denser and white on the wrong side.


Each sewer probably has his or her own cutting strategy.  Here's the one that works for me.


I get a general sense of what pieces I'm cutting where, working only with whatever fabric fits on my self-healing mat (sometimes a long pattern piece will have to be cut in sections as I redistribute the fabric on my mat).   With my Negroni muslin, I decided to cut the back first.  I do this on the fold.  Since I have my selvage ends perfectly lined up and even pinned, I am confident that I am also even with the vertical grain.

I am fortunate: I can actually make out the fabric's grainline if I look closely at the weave.   Sadly this also reflects the coarseness of the fabric.


I secure my pattern to the fabric with my weights, open my rotary cutter and begin.  Only when I am ready to cut do I release the red safety button on my rotary blade.  I secure it again as soon as I am done cutting.   If I am shifting position or moving my fabric, I secure the blade with the safety button.  Make this a habit, please.  The blade is very sharp.

Having completed cutting my piece, I now transfer the notches and dots.  I clip a scant 1/4" slit for each notch.  No triangles or anything fancy.


For circles, I put a pin through pattern and fabric, and with a fabric pen mark my fabric (on both "wrong" sides as in the case of my folded back pleat for example, the fabric having been folded with "right" sides together).


My fabric piece cut and marked, I pin it to my dress form.  You can put it anywhere you want as long as it's out of the way but the dress form insures that I can identify the piece and don't get right and left sides confused.  NOTE: If your fabric has no distinct right and wrong side, NOW is the time to label it.  I generally label it in the seam allowance with my fabric pen.  Some people use colored adhesive tape.


The "RW" above is a note to myself that this is the right sleeve, wrong side.

I work piece by piece.  The more organized you are the easier it will be.  Some people check the pattern piece off the instruction list as they cut it.  Some people move each pattern piece away as it's cut, or store each piece atop the corresponding piece of cut fabric.  Do whatever keeps you organized.

Little by little the fabric gets cut.


I take extra time to make sure I have clearly marked my sleeves.  The top (or cap) of the sleeve will have two notches in back, one notch in front.  The sleeve placket will be marked near the BACK (two notches) half of the sleeve, where the sleeve will meet the cuff.   Take the extra time and you won't get your sleeves confused.  It has happened to me many times, friends.

I also clip to mark folds and/or centers.  So for the pocket I'll clip at the narrow "first fold" and the wider "second fold" line, a scant 1/8".


If you are not cutting directly on the selvage, you will have to find the grainline of your fabric.  It may or may not be visible just by looking at the fabric.  I do this in a number of ways, with triangles and rulers.


3.  If you are using interfacing, cut that too.  Interfacing is generally attached (fused or stitched) to the outside-facing side of two matched sides, i.e., the outside of a cuff, collar, collar stand.  If you are interfacing your facings (in Negroni, those long narrow verticals that line up with your left and right front edges and will eventually be turned under) this does not apply.

The rule is generally: crisper side facing out, which makes sense if you think about it.

We've already talked a lot about interfacing.  For my muslin I am using self fabric for the facings and cuffs, and fusible woven for my collar, just to experiment.  Take advantage of your muslin and experiment!

I decide to do my undercollar, inside cuffs, and under pocket flaps in red gingham.  These will not be interfaced.


NOTE: I like to gently dry press my cut pattern pieces before I sew anything.  Any fabric cut off the grain is apt to stretch.  Keep steam pressing to a minimum and handle gently.  (Tomorrow I'll talk about staystitching.)

Friends, that's all we're doing together today.  I am here and on Flickr to answer your questions and we are privileged to have a great many experienced sewists with us as well.

If you have your own system for cutting, marking, or organizing that you wish to share that might be helpful to others, please do so.   

Happy cutting, everybody!
Read More
Posted in Men's Shirt Sew-Along | No comments

Tuesday, February 1, 2011

Men's Shirt Sew-Along 1 -- Let's get started!

Posted on 12:14 AM by dvdsvdsdv


Welcome to the MPB Men's Shirt Sew-Along!  In the next few weeks I am going to lead you through the construction of a men's shirt, starting first with a muslin and then moving on to our final garment.

I'll be using the Colette Negroni men's shirt pattern primarily, but I will be addressing more formal dress shirt patterns as well.  I will also show you how to add a front button placket, collar stand and collar to the camp-collared (i.e. one-piece) Negroni pattern.

If you haven't already, please join our Flickr group, where you can post questions both to me and to each other.  We're a large group and I will try to address as many of your individual questions as I can.  If I can't answer them, I am confident that someone else will be able to.

Our goals today are:

1. Familiarize ourselves with our pattern and read the instructions carefully.

2. Cut our pattern pieces (but NOT our individual pattern size if it's a multi-sized pattern like Negroni).

3. Trace our pattern in our individual pattern size.

4. Prep our traced pattern before cutting our fabric.

If you get to all these today, great, if not, that's fine too.  Please work at the speed that feels comfortable to you.

1. Sarai of Colette Patterns has done a wonderful job providing clear step-by-step instructions for the Negroni pattern.  While I may be doing a few things out of order (e.g., I generally add pockets only after the shirt is largely completed) I intend to follow the pattern instructions as written.  Some steps may be new or seem unusual to you but I strongly recommend giving them a try.  

While seam allowances are generally 5/8", there are exceptions and these are spelled out clearly in the instructions.  I like to make a note of them so I don't forget.  NOTE: Seam allowances are not printed on the Negroni pattern pieces (with the exception of the sleeve placket).


Please review the pattern measurements.  Do you know which size you're likely to need?  If you're between sizes, Sarai recommends you cut the larger as the Negroni shirt is cut slim.


2.  Now we're ready to cut our pattern pieces.  I do this with an ordinary pair of scissors, never with my fabric shears.

I do my cutting on the floor.  First I lay everything out.


I start with the pieces that are not sized.  I will not trace these.   They include the pocket, pocket flap, and sleeve placket.  (I store all the small pieces in a ziploc bag.)  Don't forget the button loop!


Next, I cut my big pieces.  Again: I am cutting the entire, multi-sized piece.


After all my pieces are cut, I iron them flat at a medium setting, dry (no steam).


When I'm done ironing, I'm ready to trace.

3.  Tracing is straightforward.  I'm using yellow tracing paper I purchased at my local art supply store.  The roll I bought is 18" wide.


Lay your pattern down and roll your tracing paper out on top of it.


Line up long straight edges.


I use weights to hold the paper down.


I started tracing with pencil and quickly realized I needed something darker.  A Sharpie permanent marker worked much better.   I traced the Small.  I did some tracing free hand, but generally used a ruler and French curve for greater accuracy.

NOTE: Go slow and make sure you are tracing the correct line.  A mistake you don't catch now will come back to haunt you down the line, rest assured.


Copy all the information from the pattern to your tracing paper.  Include all markings: notches, circles, grainlines, etc.  Include the name of the pattern and the size (very important).  Include the number of fabric pieces you'll be needing to cut, interfacing, etc.


Then cut your tracing paper -- this is your new pattern moving forward.


Put your original pattern where you can find it if you need to refer to it, neatly folded in a ziploc bag or wherever you generally keep them.

4.  Now prep your pattern.  I decided, after measuring the length of a favorite shirt, that I could take 1" off the length of the Negroni pattern.  This meant altering multiple pieces: the front left and right, the back, and the facings.  I also shortened the sleeve 1".


It is best to make these alterations on the "lengthen or shorten here" line.

At this point, having already prepped my fabric, I was ready to cut.

Friends, that's all we're doing today together.  If you haven't prepped your fabric yet, do so now.  Launder it, pre-shrink it in a dryer, and iron it.  You may not feel it necessary to preshrink a muslin.  Do iron it flat however.

We'll be addressing cutting tomorrow.    

If you have any questions or comments, you may leave them below or in the Flickr group.

Have fun, everybody!
Read More
Posted in Men's Shirt Sew-Along, sewing basics | No comments
Newer Posts Older Posts Home
Subscribe to: Posts (Atom)

Popular Posts

  • Positively the (next to) LAST faux fur coat post!
    Friends, they say all good things must come to an end, but honestly, I could keep working on this coat forever.  And not because it's su...
  • Requisite Halloween Post
    I don't think it's too early, do you? I recognize Halloween is a subject of relevance only to Americans (or so I believe); my apol...
  • MPB Men's Boxers Sew-Along 3 -- Let's Start Sewing!
    Good morning, Sew-Alongers and others eager to learn how to make boxers.  Today we are going to start sewing!  Yesterday I neglected to ment...
  • "Bling-a-Ding-Ding" - Faux Fur Coat Update!
    Friends, if you're like me you have poor impulse control.  That's why I'm just going to go ahead and show you how my faux fur Se...
  • Can you see my butt crack?
    Readers, today I'm going to challenge your sense of decorum and tolerance.  The easily offended might want to come back tomorrow. Oh wis...
  • Glitzy Fabrics and the Sewing Headache
    Readers, I am happy to announce that the top (I'm calling it a jacket) that goes with my Halston-inspired outfit, Simplicity 7295, is al...
  • Happiness is a Clean Sewing Table
    This may not look like anything to brag about to you, neat readers, but for me this is as good as it gets.  I can actually see the table und...
  • Dress Silhouettes Gone Wrong + POLL!
      Readers, do you believe in objective truth?  Do some ideas live in the universal mind and transcend both history and geography?  Are some ...
  • 70's Faux Fur Coat MUSLIN + Tools at the ready!
    I just finished my muslin, readers, and that little voice inside is already asking, Do we really have to do this all over again in faux fur?...
  • Men in their Underwear
    WARNING: The following post deals with adolescent themes.  Anyone over the age of 18 should be accompanied by a child. Friends, on this cold...

Categories

  • 20s glamour
  • 30s glamour
  • 40s glamour
  • 50s glamour
  • 60s glamour
  • 70s
  • age and aging
  • beauty
  • body art
  • books
  • button loops
  • Cathy
  • clothing and culture
  • completed projects
  • contests
  • crinoline
  • Daily Ditch (The)
  • decluttering
  • dime store psychology
  • dogs
  • dolls
  • Doris Day
  • fabric
  • fashion show
  • faux fur
  • flea market
  • Ginger Rogers
  • Guy week
  • Hats
  • interfacing
  • ironing
  • Jeans Sew-Along
  • Kenmore 158.1040
  • makeovers
  • Men's Boxers Sew-Along
  • men's fit issues
  • Men's Shirt Sew-Along
  • mens bathing suit
  • mens fashion
  • mens grooming
  • mens jeans
  • mens pajamas
  • mens pants
  • mens patterns
  • mens shirt
  • mens suit
  • mens toggle coat
  • mens underwear
  • mens western jacket
  • modeling
  • mothers
  • movies
  • MPB Day
  • my life
  • pattern drafting
  • patterns
  • Peter on video
  • Pfaff 30
  • project planning
  • sergers
  • sewing and culture
  • sewing basics
  • sewing machines
  • Shoes
  • shopping
  • singer 15-90
  • Singer 15-91
  • Singer 201
  • Singer 66
  • Singer 99K
  • Singer Featherweight
  • Singer treadle
  • topstitching
  • video
  • women I love
  • works in progress
  • YEA or NAY?

Blog Archive

  • ▼  2012 (35)
    • ▼  February (16)
      • Positively the (next to) LAST faux fur coat post!
      • Pocket Love + Don't Call Me!
      • MPB Valentine's Day Wishes!
      • "Bling-a-Ding-Ding" - Faux Fur Coat Update!
      • Fervently fighting faux fur fatigue!
      • Further Fur Coat Adventures!
      • 70's Faux Fur Coat MUSLIN + Tools at the ready!
      • Faux Fur Fabric Haul and MORE!
      • The Coat Project: friend or faux?
      • Random Thoughts about Seventies Coats
      • Glitzy Fabrics and the Sewing Headache
      • Men in their Underwear
      • Glitzy Halston-inspired outfit UPDATE!
      • Puttin' on the Glitz!
      • Farewell, Pfaff 30, etc.
      • Valentine's Day Sewing -- YEA or NAY?
    • ►  January (19)
  • ►  2011 (313)
    • ►  December (24)
    • ►  November (25)
    • ►  October (20)
    • ►  September (29)
    • ►  August (21)
    • ►  July (24)
    • ►  June (22)
    • ►  May (30)
    • ►  April (28)
    • ►  March (31)
    • ►  February (28)
    • ►  January (31)
  • ►  2010 (152)
    • ►  December (30)
    • ►  November (27)
    • ►  October (31)
    • ►  September (30)
    • ►  August (23)
    • ►  July (11)
Powered by Blogger.

About Me

dvdsvdsdv
View my complete profile