malepatternboldness2

  • Subscribe to our RSS feed.
  • Twitter
  • StumbleUpon
  • Reddit
  • Facebook
  • Digg

Thursday, October 6, 2011

MPB Men's Boxers Sew-Along 4 - The Joy of Bias Tape!

Posted on 6:38 AM by dvdsvdsdv


One of the things I love about leading Sew-Alongs, friends, is that I learn new techniques along with you.  I've cut my own bias tape before, but I don't think I've ever used it to decorate the visible edge of a garment.  Today, I'm going to show you how to do it!

Your boxers pattern may not call for this kind of edge finish, but you can add it anyway, or use single fold bias tape for another garment in the future.

Our goals for today are:

1.  Cut bias strips (or tape) from our fashion fabric.

2.  Stitch bias tape onto boxer leg edge.

3.  Finish bias trim by stitching "in the ditch," and close side seams of our boxers.

1.  To cut my tape, I use a plastic triangle, one edge of which I line up with my selvage.  This ensures that I'm cutting my fashion fabric at a 45 degree angle, or along the true bias.


The fact that my fabric has a vertical stripe makes the process easier.  Can you use commercial bias tape?  In theory, yes, but the only tape I've ever seen is coarse cotton poly (Wright's) and much too stiff for a project like this.

There happens to be a binding strip pattern piece in my boxers pattern (actually for a tee shirt) but you certainly don't need a pattern to cut 1½" strips, just a ruler.


I measure each 1½" strip, and cut it out with a rotary cutter.  Since none of these is quite long enough for my project, I stitch a few together to make a longer piece of tape.


2.  Here are the McCall's 3438 directions for attaching the bias binding.  If you click on the pic, you can supersize it.


One step I do differently, is that I attach my binding in two steps, essentially as one would attach a waistband.  In the first step, I stitch the binding from the front of the boxers, right sides (of fabric) together, at approximately 1/4" from the edge.  The wider your seam allowance, the wider your binding will appear.


3.  I then fold the binding over the top of the edge, and fold it under on the inside (or wrong side) of the boxer leg, so that the edge of the folded-under binding edge is slightly lower than my first, outer edge.  The reason for this is that when we "stitch in the ditch" -- i.e., stitch in the crease directly under the binding fold on the boxers front -- we catch the folded-under binding on the inside.  Does that make sense?

Notice that the binding is a little narrower on the outside, and a little wider on the inside:


Notice, too, that there is no visible stitch line on the front of the binding.  I think this looks more elegant.


Apart from these steps, I stitch on the binding just as the directions say.  At a certain point, you're going to be encasing the second side of the boxer leg, and you'll be binding over both sides together.  If it helps, you can pin or baste the side seam edges first.  When you've completed that step, you'll want to topstitch the binding flat, as you would a flat-felled seam. 

Why reinvent the wheel?  -- here are the rest of the instructions for this step:


You may be wondering if I pre-press my binding.  I do not find it necessary to pre-press -- the bias tape folds evenly and I usually just eyeball it --  but pre-pressing could be helpful.  What I find most important is to check, as I stitch "in the ditch," to make sure that I am catching the folded-under bias tape on the inside of the boxers.

 I reinforce the point where the legs meet -- you can make a bar tack (satin stitch) with your zigzagger, or just stitch back and forth a few times, if you're using a straight stitch machine, like me.


Friends, tomorrow we insert our elastic waistband, and then we'll be done with our first pair of boxers!

I hope those of you sewing along are making good progress.  I see some projects turning up in our  Flickr group, and they look great.  You certainly don't have to model them.

Have a great day, everybody!
Read More
Posted in Men's Boxers Sew-Along | No comments

Wednesday, October 5, 2011

MPB Men's Boxers Sew-Along 3 -- Let's Start Sewing!

Posted on 7:09 AM by dvdsvdsdv


Good morning, Sew-Alongers and others eager to learn how to make boxers.  Today we are going to start sewing!  Yesterday I neglected to mention thread, assuming that everybody already had the thread they need.  As you can see above, I was choosing from among an assortment of potential thread colors, finally choosing...white.   Sigh.
Our goals for today are:

1. Prepare our sewing machine for our new project.

2. Attach two front pieces (left and right) at center seam (below fly area).

3. Sew our first (ever?) flat-felled seam.

4. Working on our two front pieces, create our fly.

1. This may seem obvious, but before I start any new project, I like to make sure my machine is ready.  This means cleaning out any fuzz that might have accumulated around the feed dogs from earlier projects, making sure the thread I want to use is in my bobbin and my needle, and that I'm using the right needle for the project.  For a tightly-woven cotton shirting like the one I'm using, I like to sew with a #9 or #11 needle.  I use standard Coats & Clark thread -- nothing fancy. 


2.  The first thing most boxer pattern instructions have you do is create the front fly, and mine is no different.  Are your instructions similar?


Rather than baste the two center fronts together (as illustrated), I simply pin them together.  I skip the part about reinforcing the edge by stitching on either side of the dotted seam line.  Can anyone explain how this helps?


Instead, I stitch my first seam, the center front, from the dot (which I've marked in pencil) on down.  The seam allowance on these boxers is just 3/8".   We then clip the seam allowance (on a slight diagonal) to the dot.  You really need to clip all the way to the dot -- sharp-tipped shears are a necessity.  Here's my stitch line (my finger is where the dot is):


Now I clip:


3.  We're going to finish this center front seam by making a flat-felled seam.  Working from the wrong side of the fabric, I trim the left front seam allowance down to 1/8".  I then fold the right seam allowance over the left.   (You can do this with an iron or more easily with your finger, depending on your fabric.)


Finally, I turn the folded right edge down, encasing the narrower left seam allowance, and edgestitch (or topstitch) along the edge of my seam, using my straight stitch foot.


The result is a very strong seam.


Usually on men's shirts, the flat-felled seams are sewn on the wrong side of the shirt.  On men's jeans, it's on the outside.  It doesn't make a whole lot of difference!

4. Now on to the fly.  There is no separate fly facing on these McCall's boxers.  Working from the inside, the left fly is simply that left front "extension" folded back along the designated fold line; the raw edge is folded under approximately 1/4", and stitched down.  NOTE: This stitch line will be visible from the front of the boxers.


The right front extension is folded back less deeply (just 1") and also turned under 1/4" and stitched.


I found finishing the bottom of my right extension cleanly to be a challenge.  If I made these again, I'd cut a separate, wider facing, which would fully cover the bottom of the right fly facing and be easier to finish cleanly.  Mine ended up looking like this and I think it looks messy, though the stitching isn't visible on the front of the boxers since the left fly is lapped over the right. 


My RTW Jockeys have a much cleaner inside fly finish.


It looks like the right front has a longer, deeper fly extension than the left (it's not a separate facing).  I'll address this issue in more detail later in the sew-along.  For now, follow the directions for your pattern.  If you'd like, you can even post them in our Flickr group, here!  I'd love to see how they're different from mine and how they address the inside right fly facing.

Finally, matching the center fronts (which were marked on the pattern), we lap left fly over right, and stitch through all layers.


Friends, that's it for today!  Tomorrow we'll move on, and I'll even show you how to cut bias binding!

Happy sewing, everybody!
Read More
Posted in Men's Boxers Sew-Along | No comments

Tuesday, October 4, 2011

MPB Men's Boxers Sew-Along 2 -- Pattern Prep and Fabric Cutting!

Posted on 7:08 AM by dvdsvdsdv


Welcome, Sew-Alongers and lurkers!  As you can see above, boxers patterns generally aren't complicated -- often just two pieces -- but there's definitely more to them than meets the eye.  Today we're ready to prepare our pattern and start cutting our fabric!

Our goals for today are:

1.  Cut out our pattern (if it needs cutting out), iron it flat, and inspect pattern and instructions carefully.

2.  Prepare our fabric for cutting.

3.  Cut our fabric!

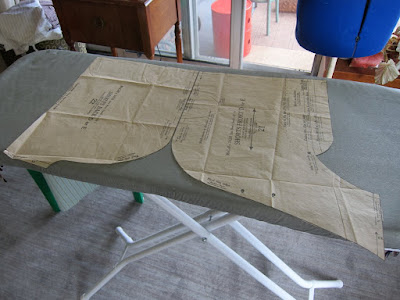
1. Now, I know some of you are using multi-sized patterns for this sew-along, so you may have an additional step that I don't have.  My mid-Seventies pattern is just one size -- conveniently enough, mine -- so while I have to cut my pattern out, I don't have to make any sizing decisions.

If you're using a multi-sized pattern and you're not entirely sure what pattern size you need (say, Small or Medium), I recommend tracing the pattern size you think you need and leaving the original pattern as-is.  That way, should you need to trace a different size in the future, you'll be able to.  (The pattern envelope should state clearly the measurements for each of the sizes included in the pattern, but you won't know until you make the pattern if there's too much ease for your taste, for example.)

I use yellow tracing paper sold by the roll at my local art supply store.   You can use wax paper, other kinds of craft paper: anything that allows you to trace should work.  Be sure to transfer all the markings on the original pattern to your traced copy, including the size traced.


For my first pair of boxers, I'm making View "D" on my pattern envelope -- the red boxers with bias trim (though mine won't be red, alas).


The first thing I do -- and please don't skip this step, friends -- is to read the instructions carefully and inspect the pattern closely.  Does it all make sense?  Do you understand what the lines, dots, and language on the pattern mean?  If you don't, ask!


My pattern is just two pieces.  One piece (the back, # 22, above) will be cut just once, on the fold of the fabric (fabric is folded parallel to the selvage), while the other (#21, below) is cut twice, but not the fold.


Review the instructions.  Are you familiar with the sewing techniques involved?  If you're not, read about them in a sewing book, and take a sample piece of fabric and try them out (a flat-felled seam would be a good example of this).   My pattern calls for the use of bias tape, which I make myself from my fashion fabric.   Yours may not, but rather require a basic hem.


The fly area is going to be the most complicated part of any men's boxers project.  Do you understand how it will be created?  Even though the left and right fronts of my boxers use the same pattern piece, the fold lines for the fly facing are different for each side.  Is this true of your pattern?  If so, pay attention when you're copying markings to your cut fabric.

Make sure you don't get your right and left fronts confused.  My fabric is the same back and front, so it's easy to get the left and right fabric pieces, and right and wrong sides of my fabric, confused.


Before I lay my pattern down on my fabric, it must be flat.  I generally iron my paper pattern on a low setting, always with the steam turned off.  Please don't steam your pattern!

2.  Here's the selvage of my fabric, and you can see from it that this is very tightly woven cotton shirting.  Do you know where your selvage is?


My fabric is ironed flat.


I lay my fabric down on my self-healing cutting mat.  I cut using an Olfa 60 mm rotary cutter and a green self-healing mat.  I use my fabric shears for cutting any threads that the rotary cutter doesn't get.  NOTE: Never switch body positions with the rotary blade out.  After cutting, immediately retract the blade.


3.  The beauty of striped fabric is that it's easy to find the lengthwise straight edge.


I don't pay much attention to the cutting diagram on my pattern instructions since I have much more fabric than I'll need.  If you have just enough, I recommend checking the diagram so you can see the most economical way to cut your fabric.


I mark my Center Fronts with a tiny snip of the fabric.  You can use pencil or washable crayon, or whatever works for you.


Now, with my pattern cut (except for bias trim), I'm ready to start sewing.

We'll start that tomorrow!


You can leave questions or comments below, or in our Flickr group.  (You can join the group here (if you're already a member of Flickr) or by emailing me at peterlappinnyc at gmail dot com.)  I see some of you are using some pretty wild fabric.  Love it!

How's it going so far?

Have a great day, everybody!
Read More
Posted in Men's Boxers Sew-Along | No comments

Monday, October 3, 2011

MPB Men's Boxers Sew-Along 1 -- Prep Time!

Posted on 6:45 AM by dvdsvdsdv


Good morning, all, and welcome to the MPB Men's Boxers Sew-Along!  I can't wait to get started making myself some new boxer shorts and I hope you feel the same.

NOTE: I'll be working a pace that suits me -- please work at a pace that suits you; there's no rush!

And off we go...

Our goals for today are:

1.  Inspect a pair of RTW boxers, both inside and out, and note seam finishes, elastic insertion, stitch length and type of stitches.

2. Measure the waistband and the rise of our commercially sewn boxers.

3. Prep our fabric: wash, dry, and iron flat. 

1.  The more time we invest in our preparation, the easier it will be to sew our garment.  Today, I want you to inspect closely a pair of ready-to-wear boxers, if you have access to any.  Ideally, this is a pair whose fit we like.

Let's examine how boxers are constructed.  We might not make be making the exact same style of boxers as these, but they can provide a road map.

Here is a pair I've worn for many years, plaid cotton/poly Jockeys.  There's nothing special about these boxers, but they are very well constructed and professionally finished.


Here are a few things I notice that can help me down the road -- and help you too.

a) The fly is lapped left over right, just like a pair of men's jeans.  

b) With the exception of the fly area, the major construction seams are all flat-felled, meaning there are no inside seams that need to be finished.  If you are not flat-felling your seams, you'll want to overcast, serge, or pink your seam allowances.  Raggedy, fraying inside seams are a no-no in men's underwear!


c) The hems are finished with bias seam binding cut from our fashion fabric.   This may or may not be part of your pattern.  I love the way it looks, and you can use contrasting cotton fabric if you want to get creative.


d) The stress points -- the bottom of the fly, and the point where the side seams meet, are finished with a short satin stitch. 


e) The elastic waistband is attached using a straight stitch, though you might want to use a narrow zigzag.


Interesting, right?

2. The measurements that interest me most are the waist and the rise.  Measure the waist with the waistband elastic pulled taut until the fabric lies flat.  Mine measures 36" even though I'm wearing Size 32 boxers.  This extra fabric is what's called ease.  Your pattern may have more or less ease than my Jockeys.  Don't worry if at first your boxers seem too large at the waist before you insert your elastic waistband.  This is part of the ease.

NOTE: Some men will always find boxers too baggy to wear under tight-fitting jeans because of the ease in the boxers.  Without the ease, however, the boxers would likely feel too snug.  It's a trade off.

Next I measure the rise.  This is from the point beneath the groin where the inseam and front seams cross, up to the top of the waistband.  I measure this both front and back.  Both measure  approximately 13.5".


This gives me a good idea of how I'll want my boxers to fit, and I may need to tweak my pattern to accomplish this.

3. Before we start cutting our fabric, we need to prep it.  Cotton fabric needs to be washed, dried, and ironed flat, before we can start cutting and sewing.  If you haven't done this already, please do so.

Sew-alongers, that's all for today! 

As you know, I have created a Flickr group for participants the Men's Boxers Sew-Along.  You can join here (if you're already a member of Flickr) or by emailing me at peterlappinnyc at gmail dot com.  The Flickr group is the best place to ask questions regarding your projects, or to leave comments for others.

Have a great day, everybody!

P.S - Two big Daily Ditches this weekend: this and this!
Read More
Posted in Men's Boxers Sew-Along | No comments

Friday, September 30, 2011

Self-sewn Trash

Posted on 6:30 AM by dvdsvdsdv


I'm on a roll, readers, oh, am I on a roll!

Yesterday I asked you about the challenge of ditching home-sewn garments, as opposed to throwing away ready-to-wear.  Well, I've discovered that it's not that hard.  There are three key questions one must ask oneself:

1) Have I ever worn this?

2) Would I ever wear this?

3) Will I ever wear this?

If you consult your Magic 8 ball and you get....


...then dump quickly and don't look back!

Here are a few items I'm dumping:  The jacket posted above, my first-ever tailored garment and not a bad stab, but unwearable (not least of all because of the color and the cheap polyester fabric); a sheet shirt that was never able to transcend its identity as faded old bedding; and a dress I started making for Michael's sister Sara when she was visiting two years ago, and never finished. 


A little somber, wouldn't you say?


But I have even better news!  Remember that men's display dummy I purchased a long time ago on eBay that was the wrong size (too big), and just sat in my foyer collecting dust and occasionally serving as a coat rack?  I found a buyer for it on Craigslist!  It's gone!


And -- miracle of miracles -- I think I found someone who will take my vintage luggage off my hands.  I'll know more later today.   I am so stoked, guys.

UPDATE: Sold!


My next big hurdle is to sell a bike that's been collecting dust in our bedroom for many years and driving Michael crazy since it's on his side of the bed.  I bought it on Craigslist for not a lot of money, but the frame is too big.  Should I have to brake suddenly and jump off the bike, I would -- how shall I put this? -- crack an egg.  Not very safe.

Meanwhile, look what I got for Cathy's shoe collection:


I hate paying for storage-related items like these, but they do make a difference.

Finally, readers, there's some sort of sewing blogger meet-up today in NYC I'm supposed to go to, but I'm sort of on the fence about it.  As any sewing blogger knows, we're all kind of control freaks -- otherwise we wouldn't have our own blogs but would be contented reading others' -- and this one has been organized up the yinyang, as they say.  It even has a costume theme!

I may pop in for lunch and skip the rest. Would that be wrong? I hope you don't think I have a bad attitude; I have a lot going on today.

In closing, I'm excited to hear that many of you will be sewing underwear with me next week -- we are going to have fun, fun, FUN!

Have a great day, everybody!

PS -- you can see all my Daily Ditches so far here.
Read More
Posted in Daily Ditch (The), decluttering | No comments
Newer Posts Older Posts Home
Subscribe to: Posts (Atom)

Popular Posts

  • MPB Men's Boxers Sew-Along 3 -- Let's Start Sewing!
    Good morning, Sew-Alongers and others eager to learn how to make boxers.  Today we are going to start sewing!  Yesterday I neglected to ment...
  • Positively the (next to) LAST faux fur coat post!
    Friends, they say all good things must come to an end, but honestly, I could keep working on this coat forever.  And not because it's su...
  • Requisite Halloween Post
    I don't think it's too early, do you? I recognize Halloween is a subject of relevance only to Americans (or so I believe); my apol...
  • Men's toggle coat - cutting fabric, purchasing notions, etc.
    And off we go! Friends, the toggle coat project is moving along.  Yesterday I made my pattern adjustments (basically just taking 4" wid...
  • Elusive interfacing consensus + GAP shirt inspection!
    Readers, I have concluded that the subject of fusible interfacing is a perfect metaphor for life itself: we all have our ways of being/doin...
  • Happiness is a New Sewing Machine
    Wait, have I used that title before? Readers, there are two kinds of sewing machine purchases: the kind where the thing you're most exci...
  • Positively the LAST decluttering post
    Brace yourself, friends, my notable Necchi is no more.  She won't be picked up till next week but I have a deposit.  How exciting is tha...
  • Can you see my butt crack?
    Readers, today I'm going to challenge your sense of decorum and tolerance.  The easily offended might want to come back tomorrow. Oh wis...
  • The Last Toggle Post
    Dear readers, a million thanks for yesterday's comments.  I think we're all going to enjoy wearing this coat and don't think I...
  • Glitzy Fabrics and the Sewing Headache
    Readers, I am happy to announce that the top (I'm calling it a jacket) that goes with my Halston-inspired outfit, Simplicity 7295, is al...

Categories

  • 20s glamour
  • 30s glamour
  • 40s glamour
  • 50s glamour
  • 60s glamour
  • 70s
  • age and aging
  • beauty
  • body art
  • books
  • button loops
  • Cathy
  • clothing and culture
  • completed projects
  • contests
  • crinoline
  • Daily Ditch (The)
  • decluttering
  • dime store psychology
  • dogs
  • dolls
  • Doris Day
  • fabric
  • fashion show
  • faux fur
  • flea market
  • Ginger Rogers
  • Guy week
  • Hats
  • interfacing
  • ironing
  • Jeans Sew-Along
  • Kenmore 158.1040
  • makeovers
  • Men's Boxers Sew-Along
  • men's fit issues
  • Men's Shirt Sew-Along
  • mens bathing suit
  • mens fashion
  • mens grooming
  • mens jeans
  • mens pajamas
  • mens pants
  • mens patterns
  • mens shirt
  • mens suit
  • mens toggle coat
  • mens underwear
  • mens western jacket
  • modeling
  • mothers
  • movies
  • MPB Day
  • my life
  • pattern drafting
  • patterns
  • Peter on video
  • Pfaff 30
  • project planning
  • sergers
  • sewing and culture
  • sewing basics
  • sewing machines
  • Shoes
  • shopping
  • singer 15-90
  • Singer 15-91
  • Singer 201
  • Singer 66
  • Singer 99K
  • Singer Featherweight
  • Singer treadle
  • topstitching
  • video
  • women I love
  • works in progress
  • YEA or NAY?

Blog Archive

  • ▼  2012 (35)
    • ▼  February (16)
      • Positively the (next to) LAST faux fur coat post!
      • Pocket Love + Don't Call Me!
      • MPB Valentine's Day Wishes!
      • "Bling-a-Ding-Ding" - Faux Fur Coat Update!
      • Fervently fighting faux fur fatigue!
      • Further Fur Coat Adventures!
      • 70's Faux Fur Coat MUSLIN + Tools at the ready!
      • Faux Fur Fabric Haul and MORE!
      • The Coat Project: friend or faux?
      • Random Thoughts about Seventies Coats
      • Glitzy Fabrics and the Sewing Headache
      • Men in their Underwear
      • Glitzy Halston-inspired outfit UPDATE!
      • Puttin' on the Glitz!
      • Farewell, Pfaff 30, etc.
      • Valentine's Day Sewing -- YEA or NAY?
    • ►  January (19)
  • ►  2011 (313)
    • ►  December (24)
    • ►  November (25)
    • ►  October (20)
    • ►  September (29)
    • ►  August (21)
    • ►  July (24)
    • ►  June (22)
    • ►  May (30)
    • ►  April (28)
    • ►  March (31)
    • ►  February (28)
    • ►  January (31)
  • ►  2010 (152)
    • ►  December (30)
    • ►  November (27)
    • ►  October (31)
    • ►  September (30)
    • ►  August (23)
    • ►  July (11)
Powered by Blogger.

About Me

dvdsvdsdv
View my complete profile